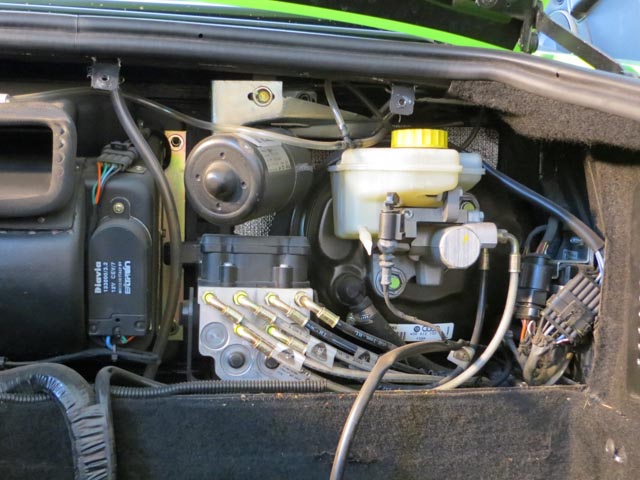
I recently started having really weird e-gear issues in my Murciélago Roadster.
The first sign of problems was when I stopped in a parking lot, left it in 1st and went into a grocery store. When I came out, it refused to start, or come out of gear. I called Josh at ECS and we tried hooking it up to a Leonardo, which showed correct hydraulic pressure, but it simply refused to change gear. I ended up having to put it on a flatbed, but, because it was stuck in gear (and is all wheel drive) this was difficult. We ended up having to raise it on wheel jacks and winch it onto the flatbed.
When it got to the shop it misbehaved for a while - we added some hydraulic fluid, and bled the system, and then suddenly it started working. While doing this, Josh also adjusted the P.I.S (Point of Initial Slippage) - this made the shifts much much smoother.
A few weeks later I was just turning back into my driveway, and it started behaving oddly again - she didn't really seem to want to change gears, but grudgingly agreed to after a few pulls on the paddles... but it all felt "weird". I put it in the garage and called Josh.
He made a house call and we spent some time with the computer, exercising the E-gear actuator. It kept working properly, which was very frustrating - I didn't want to be driving the vehicle not knowing what the issue was, or when it might happen again... and then, suddenly, it all stopped. Instructing it to change gears, either through the paddles, or through the computer resulted in her simply ignoring us.
We then noticed that she had just logged a brake switch error...
When I first purchased the Murciélago I spent a bunch of time reading up on known issues. The main one that people were mentioning was the fact that the brake switch was a known weak point, and would suddenly die and leave the owner stranded. I purchased a spare brake switch, "just in case" and kept it in the trunk (this was the one and only emergency spare part I got). We tested that this was a problem by watching the brake sensor output in the computer - sometimes it would believe that the brake pedal was pushed when it wasn't, sometimes it would believe that the pedal was not pushed when it was.
Removing the old brake switch is easy - you climb into the driver's footwell, the brake switch is mounted on a bracket facing the brake lever. You remove the electrical connector, and then rotate the switch to remove it.


Replacing the switch is significantly harder, at least until you know the tricks. The problem is that the front of the switch needs to go through the keyway in the bracket, and then rotate to lock in into place. There is an interlock that prevents the switch from rotating until the plunger is pressed and held in. After removing the old switch, you might want to play with it to see how it locks, and how it turns.
Installing it is made tricky by the fact that you are lying on your back in the footwell, and need one hand to press in the brake pedal to move it out of the way. You need your other hand to press the switch in, and then your third hand to press the plunger. If you happen to not have been born with only two hands, you are kind of stuck at this point. The trick which I finally figured out was to start the engine. This provides vacuum assist, and allows you to move the pedal with your hand (or by resting your head on the pedal) and install the switch with only 2 hands
This completely fixed the issue - we tested it on the Leonardo for a while, and I've taken her out for a number of great drives, all with perfect, crisp shifts.
I ended up disassembling the old switch to see how it worked, and more importantly, how it failed.


These show the disassembled brake switch. The pedal lever presses on the pin, which makes the blue plunger slide back. This slides over some cams, opening the contacts. It seems that, over time, the plunger wears down the plastic cams on the switch, leading to the contacts not fully opening / becoming intermittent. There are two sets of contacts, it sems that one is actually for detecting when the switch is pressed, and the second is a self test / monitoring pair. This all seems way over engineered.
Replacement switches are really cheap (around $12.00USD), and, in my opinion, worth keeping one in the car, just in case it fails while you are out on the road.
They are an Audi part (3B0945511C, these superceed 3B0945511B), and are used in various cars, including Lamborghini Murciélago, Gallardo Spyders, Superleggera, Audi A4, A5, A6 and VW Golf mk5.
Ricambi America has them here and BullStuff has them here.
Adding push button start to a Lamborghini Murcielago.
The Murcielgo uses the same center console switch unit as the Gallardo, but only two of the three buttons do anything - the third simply sits there, taunting me. I really wanted the center switch to do something... anything... So, while she was put way for the winter, I decided to make the unused center button into an Engine Start / Stop button.
This is some info on the project.


Center switches.
Having a big "?" on the center switch helped with the annoyance somewhat. For a while I considered replacing the (hand painted) "?" with "Ejector Seat", but wanted it to actually do something, so...


Center switch unit


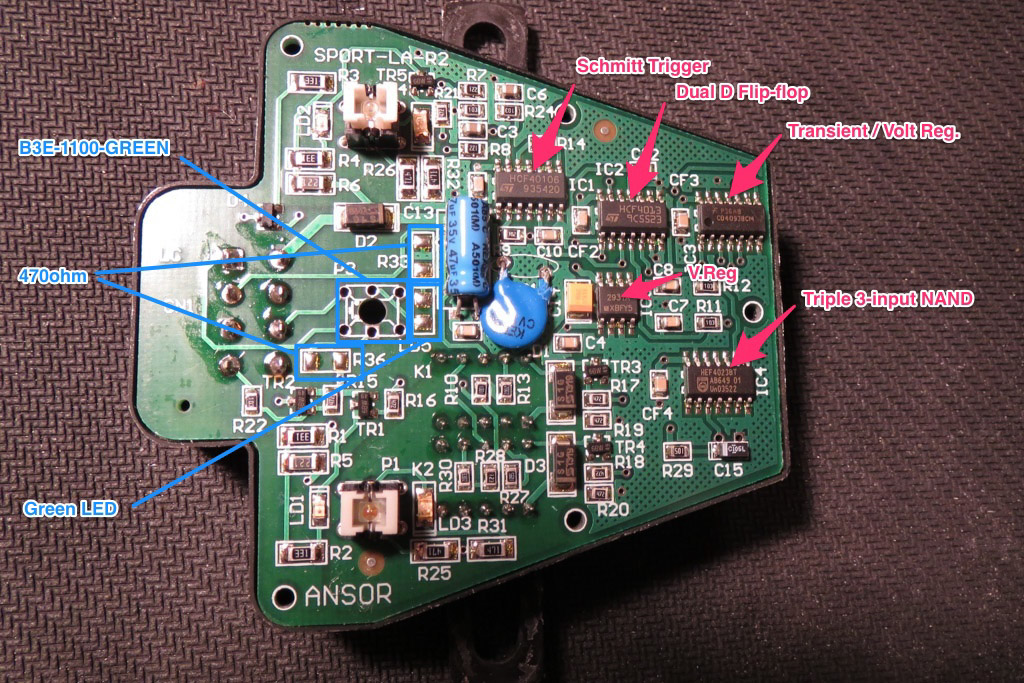
Disassembled center switch unit. Marked up with components.
As you can see from the final picture, the center switch unit is missing the center switch itself. I was hoping to be able to read the manufacturer and part number off one of the other switches without removing them from the baord, but no such luck, so I unsoldered the rightmost one, and... was still not able to find a manufacturer... After spending a large amount of time looking through online catalogs at DigiKey and Mouser and similar I finally found the correct switch at Jameco Electronics.
They are Omron B3E-1100-GREEN (or B3E-1100-RED), Jameco part number 2076287, available here. The board is also missing a surface mount green LEDs and two 470Ω SMT resistors for illumination. I had a bunch of LEDs around, but had run low on SMT resistors so I ordered some more as well. When I went to install them I discovered that the LEDs I had were 0603 package (and not 1206), but with a bit of careful soldering was able to make them reach.


Soldered on switch, LEDs.
I was originally planning on having the middle button only perform the "crank" function (engage the starter motor); this would have been really simple, just hook the switch up to a relay and run wires to the back of the keylock unit... But, once I'd gotten this far into the project I decided I might as well go all the way and have the single button perform all the actions.
As there is only one button I had to get a bit creative with the interface. The first press of the button turns on Accessory (ACC) mode. The next press turns on Ignition (IGN). A third press turns everything off again. While Ignition is on, pressing and holding the button for more than one second cranks the motor. To keep things simple (and make it easier if anyone else wants to do this) I decided to do this with an Arduino.


Prototype Arduino (extra LEDs for debugging) and relay board
I did the prototyping on a breadboard with a Boarduino (Arduino compatible) Kit w/ATmega328 from one of my favorite online places, Adafruit Indutries. There is no way that the Arduino will be able to switch the required current, so I built a little relay board with two relays, each with a snubber diode and a transistor to switch it. The only relays I had in stock were either quite small (like above) or really large, and needing 48v for the coil. I settled on the small ones, but their contacts are only rated for 2A @ 30V. After wasting an hour or so with this I looked online and found Amazon selling SainSmart 4-Channel Relay Modules for <$14 Prime. These have 4 relays rated at AC250V 10A, DC30V 10A, opto-isolators, indicator LEDs, etc and are designed to be driven by a microcontroller. I decided to just order these (and a bunch more for keeping in stock :-)) and play with the code instead.
[ MORE TO COME, Including Arduino source, relay info, STL for the buttons themselves, steering switch lock, etc. ]
Lamborghini and Ferrari switches and some parts suffer from a condition known as "stickiness". The issue is caused by a thin layer of rubber applied by the factory for aesthetic reasons -- unfortunately, over time the rubber brakes down and becomes very sticky and turns into black goop. This gets all over your hands, and then transfers to the door handles, leather, carbon-fiber, etc. Once there it is really really hard to remove.
I recently replaced the stereo in my Lamborghini Murcielago Roadster, which required removing most if the interior (basically everything other than the dash itself). While I had it all in pieces I decided to clean / detail all the bits, and remove the stickiness. Here is the process:
First off I removed all the interior bits. The original plan was just to remove the carbon-fiber A/C panel and slide the stereo out -- unfortunately the bottom lip of the radio sits below the carbon center tunnel cover, so I had to remove that, which in turn required removing the center armrest, which required removing the rear leather panels, which required removing the seatbelts, which required...
Anyway, I wasn't expecting to have to remove all this, if I'd known just how much was coming out I'd have started by removing the seats, instead of leaving them till the very end. Once all the bits were out I took them into the house and spent the next day or two cleaning all the leather with Leatherique Prestine Clean and Rejuvinator Oil, and cleaning the carbon fiber with einzett Plastic Deep Cleaner and then a layer of 303 Aerospace Protector. The einzett stuff gives a deep, rich gloss to carbon fiber, and the 303 helps protect it from UV damage.
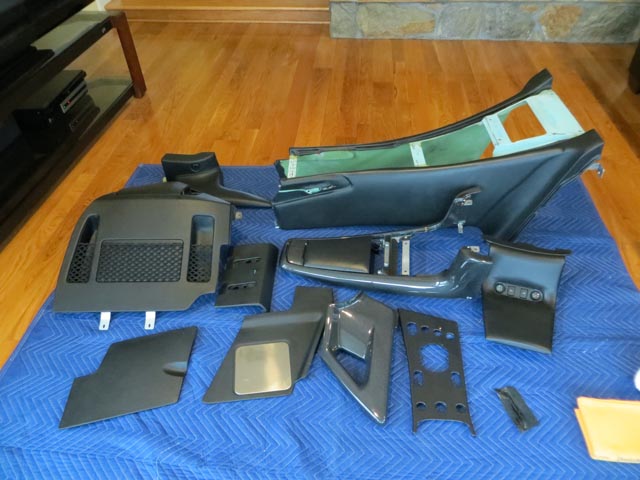
Once that was done I pulled all the switches from the body pieces. Most of the switch-gear simply screws into the bodywork with allen bolts. There are a number of fiddly washers that act as spacers - the wonders of hand-built Italian cars :-P
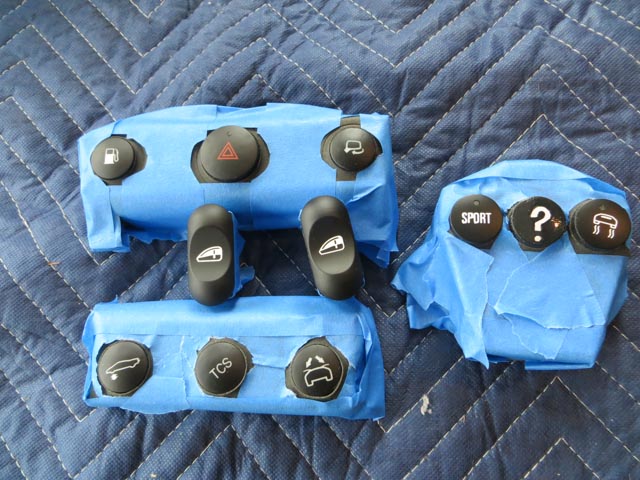
I tried a number of tricks to remove the sticky rubber layer. There are a huge number of suggestions on the forums, ranging from soaking overnight in Easy-Off Oven cleaner (!) to Simple Green and lots of elbow grease. I tried various option, but by far the best (for me at least) was LA's Totally Awesome Cleaner, which I picked up a while back at a dollar store!
Here is a treated and an untreated window switch
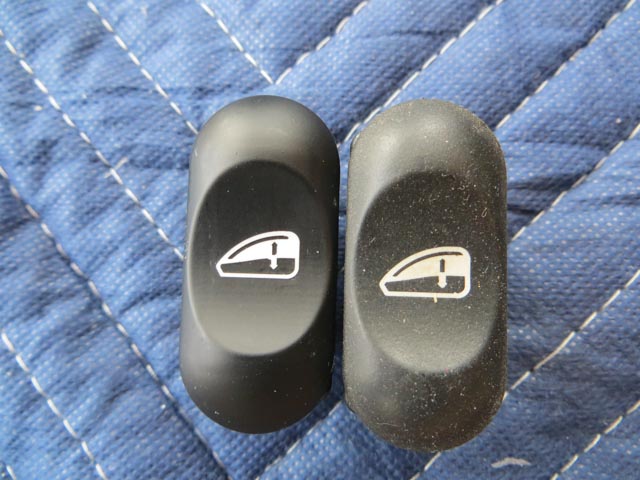
After a few hours of removing all the stickiness I decided that I'd like some slight rubber texture on the switch-gear, so I carefully taped it all off and gave it 5 or 6 very light coats of clear Plasti Dip Spray.
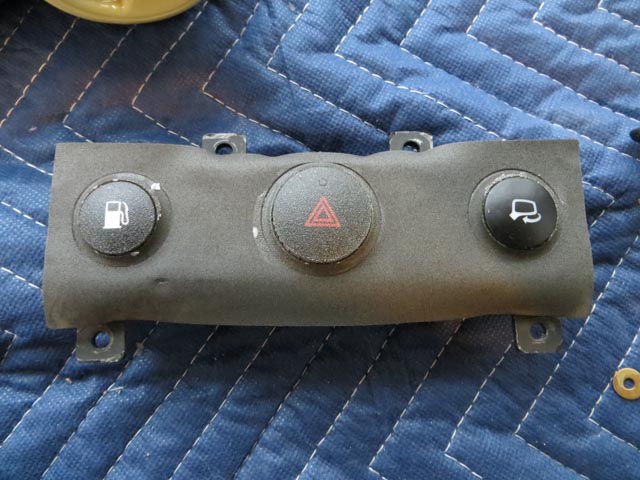
Unfortunately, once it dried properly it looked a little too textured (and slightly frosted), so I pulled it all off again.
After that was done I gave the seats a few coats of Leatherique to keep them supple and reassembled everything.
A view of the lift system
