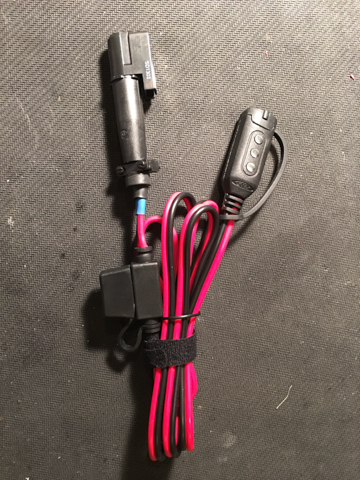
For a number of years I've been making adaptor cables to convert from the proprietary Ferrari charger connector to the CTEK connector. This allows people to use the CTEK series of chargers to charge / battery tend their Ferraris. Ferrari rebrands the (lowest end) CTEK, and puts on thier proprietary connector, but many people would rather use one of the higher end / more sophisticated CTEK, or replace a dead Ferrari branded one, etc.
Using the Ferrari connector is much nicer than simply wiring the ring terminals to the battery, including:
- It is more convenient - the Ferrari connector is bolted to the vehicle, and so less fiddling around in the footwell.
- Much simpler - you simply plug in a connector, you don't have to unbolt panels and bolt ring terminals to the battery.
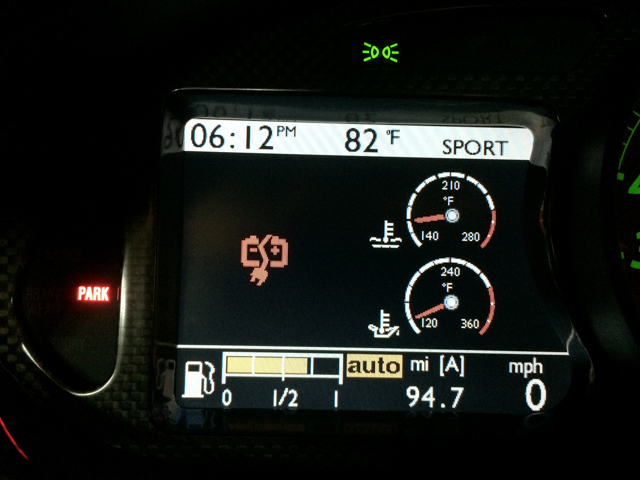
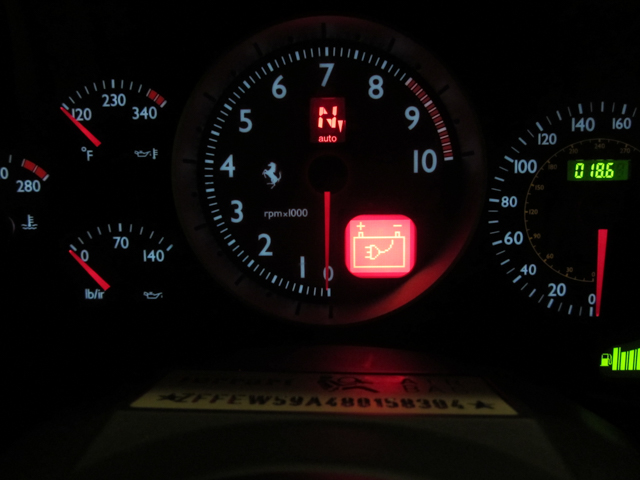
- Most importantly (to me at least), the Ferrari connector includes a "sense" wire. This means that the car will display an icon on the dashboard and refuse to start while the charger is connected, this prevents the embarrassing driving off while the charger is connected issue :-)
I make (and see these) cables, but I'm as happy for people to make their own (I'm somewhat OCD about making cables, and have over-engineered these. This means that it takes me around an hour per cable to make. The amount I sell them for isn't really worth my time, so I mostly make these for the good of the community).
If you have any questions, email me at
Parts:
- MBG4P-1 - DigiKey: SOU1192-ND $8.05ea - 4 Pin Souriau MBG Series Connector
- MBG4S-1 - DigiKey: SOU1196-ND $4.30ea - 4 Pin Souriau MBG Series Shell / Strain Relief.
- RC14M50K - DigiKey: SOU1970-ND $1.11ea (x 3) - Souriau 14AWG Machined Crimp Connector OR
- SC14ML1S6 - DigiKey: SOU1247-ND $1.62ea (x 3) - Souriau 14AWG Stamped Crimp Connector
- CTEK (56-384) - Amazon: LINK $9.99 - Comfort Indicator Clamps
- 18AWG strunded wire
- Various heatshrink
- Hotglue
I have provided part numbers for both machined (RC14M50K) and stamped (SC14ML1S6) contacts. The machined contacts are much nicer, but require a specific crimper head (S16RCM1450 $292) and handles (SHANDLES $125). The stamped ones work OK, and I'm using them in this tutorial because I don't really expect people to buy $417 worth of crimper just to build one cable. Actually, I'm using the stamped connectors meyelf at the moment, because my S16RCM1450 head broke, and the replacement is backordered till 1/8/2016. Whatever contacts you choose, you should buy a bunch of them - Digikey shipping is quite expensive, and you may miscrimp some.
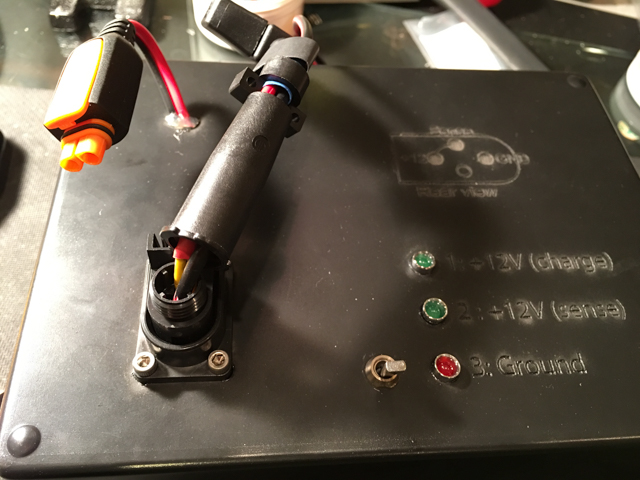
Pinout:
- Pin 1: +12V
- Pin 2: Sense
- Pin 3: Ground
- Pin 4: N/C
When Pin2 is raised to +12V to illuminate the warning icon on the instrument panel and prevent the vehicle from starting.
Instructions:
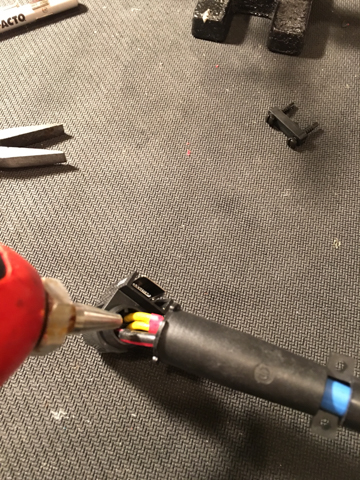
Start off by removing the clamp connectors - prise off the plastic protectors, and then unsolder the clamps. Do not cut off the clamps, or the remaining wire will be too short to easily insert with the strain relief and connector.
Crimp a contact onto the (tinned) black (ground) wire. As I mentioned, I'm a little anal about making cables, and so I go a little overboard. This is how I do mine:
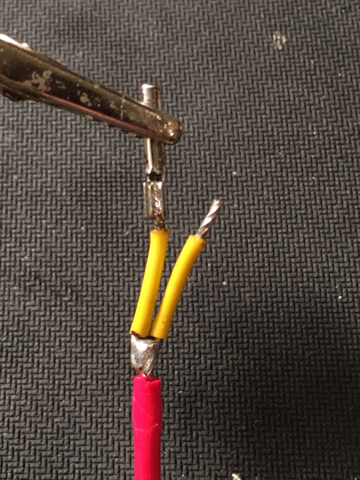
Add a tiny bit of flux into the connector cup, and then add some solder into the cup. Then put in the tinned cable, and heat if from the bottom (to make sure that solder fully wets / flows. Then crimp (with good quality, ratcheting crimper with the correct sized head, for example a Wiha 436) the connector on, and finally flux over the top of the crimp and solder over the top. I've tested this system, and it provides me a much stronger (and lower resistance) connection than crimping or soldering by itself.
Next, cut a 3.5" piece of 16AWG stranded wire. Fold this in half, and mark 0.25" down from the fold. Unfold this, score round the insulation and then cut down the length of the insulation, and remove this piece. Then trim ~0.25" of insulation from each end.
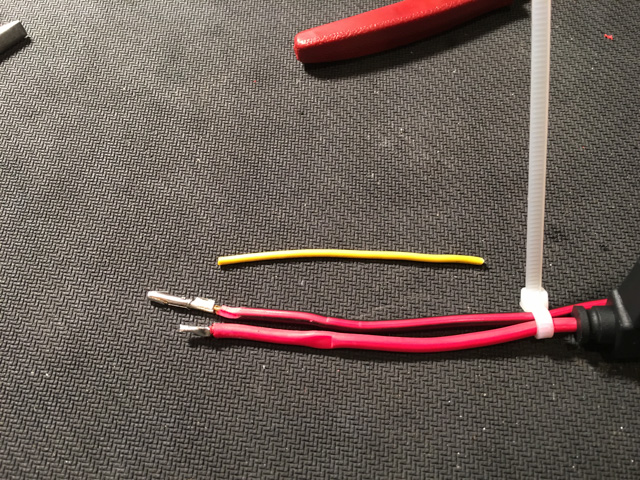

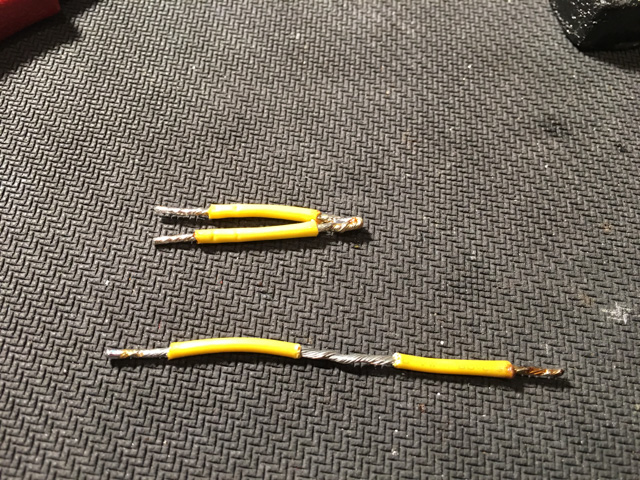
Now, fold the cable again, liberally flux it and then tin the center and ends. Make sure to not have the insulation touching when tinning the center or it will stick. Now, lay the folded, tinned 16AWG wire next to the carger cable, and carefully align them. I ziptie the red and black together to make sure that they are nicely aligned. Now, mark and cut the red (12V) cable, making sure to take into account the length of the wire going into the contacts, and enough to solder - you want the wires to be the same length so that they have the same tension. Solder the contacts onto the ends of the 16AWG wire, using the technique above.
Now solder the charger wire onto the 16AWG jumper, and put on a bit of heatshrink.
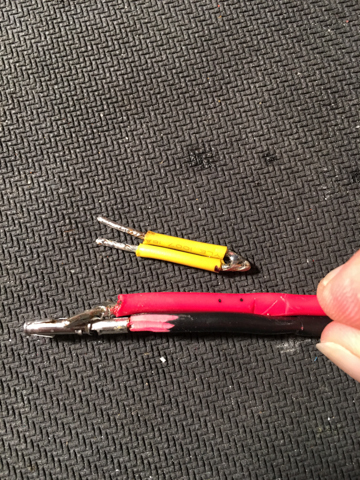
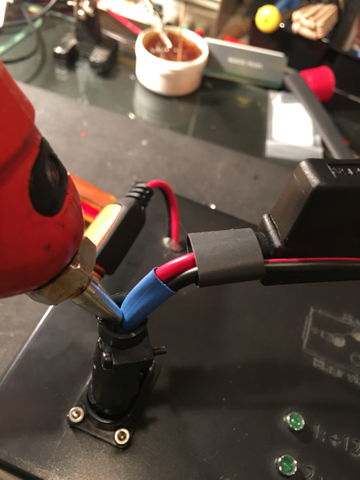
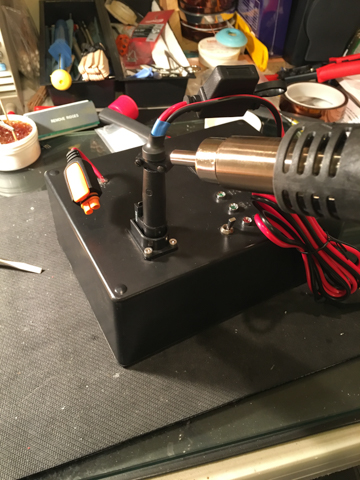
When shrinking the heatshrink, I use a hot air surface mount solderer. This works much better than a heat gun (or lighter!), because it makes a much more focused stream of air - without this, you rish melting the insulation.
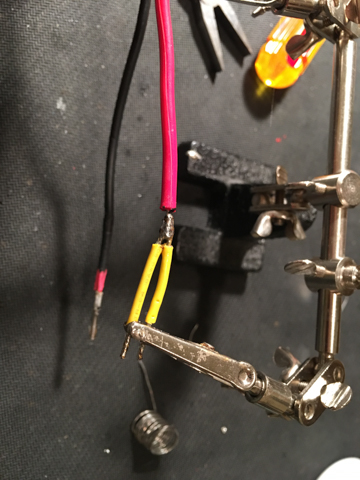
Next, slide on some heatshrink and don't forget the shield, or you will become very sad. :-)
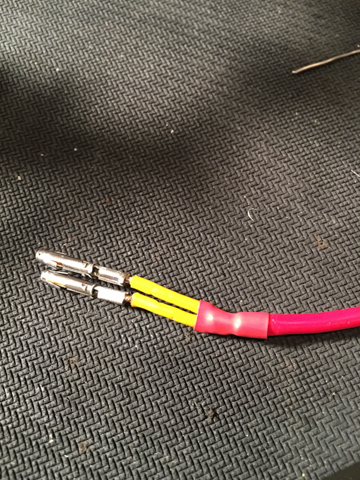
Now, insert the contacts into the shell, making sure that the contacts have fully seated. This will be quite fiddly (especially if you included some heatshrink to go over the back of the strain relief), and you will be glad that you unsoldered the clamps, because this gives you an extra ~0.25". I use a pair of needle nosed pliars to push the wires from the back. Now, test the pinouts to make sure you have it all right. I have built a test jig to allow me to accuratly and quickly test mine, but a multimeter will work.
Once you have triple checked the pinouts and that there are no shorts, squeeze some hotglue into the back of the connector shell, slightly overfilling it, and then quickly screw the strain relief on. This will tightly hold the cables, provide good strain releif, help keep things dry (and corrosion free), and prevent it unscrewing.

Now, add some more hotglue in through the cutout in the strain relief, and quickly screw the cable clamp onto the back. Some hotglue will squish out, trim this off with an xacto knife, and then hit it with a heatgun to clean it up. Now, put some more glue in through the back of the strain relief and slide the last piece of heat-shrink over the back and shrink it on.
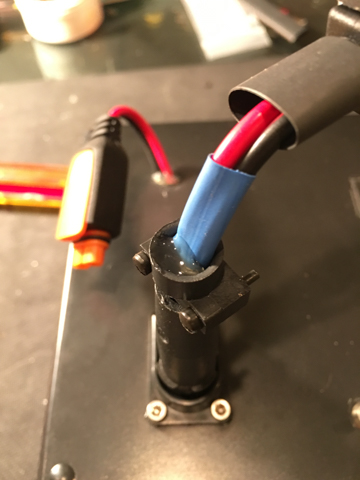
Finally, test it one last time, and you are done!
You could do this all with much less work, by cutting a bunch of corners (like just crimping the contacts, or splicing wires together, or not using the correct crimper), but, if you are going to bother doing it at all, you might as well do it right.